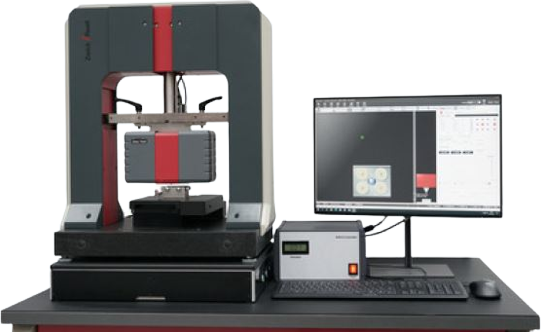
The ZHN-S is a further development of the ZHN from 2022. The Nanoindenter is suitable for determining the mechanical properties of coatings and surfaces by means of the instrumented indentation test as well as the wear properties. The determination of hardness and Young’s modulus is performed according to the instrumented indentation test according to DIN ISO 14577: 2015 (Determination of hardness and other material parameters for metallic materials and coatings). There is a choice of 3 measuring heads with maximum forces of 0.2 N, 2 N or 20 N, which can be easily exchanged by the user. Thus, the device covers the nano to macro range.
With all measuring heads, dynamic measurements can also be carried out with an oscillating tip with frequencies up to 300 Hz. This is used for depth-resolved measurements, fatigue tests or measurements of viscoelastic properties. In addition, scratch and wear tests without friction measurements and profilometric measurements (surface scans) can be performed. Up to 10 measurements per minute allow fast mapping of mechanical properties.

Special features of the device that distinguish it from other devices are:
- Animations and predefined applications in InspectorX support the operator in preparing and performing the inspection. This reduces operating errors and guarantees/ensures short training periods
- Operation and result evaluation is also possible by trained specialists and not by scientific staff, which reduces testing costs
- Easiest and most robust tip change of all instruments on the market without recalibration: The calibration data are clearly assigned to the measuring tip
- The excellent dynamic module enables particularly accurate and fast calibration of the measuring tip and also the depth-resolved measurements required for layers
- Operation and result evaluation is also possible by trained specialists and not by scientific staff, which reduces testing costs
- The optics with 20 megapixel color camera allows 4x zoom without loss of resolution. This covers a magnification range of up to 3 classic turret lenses and eliminates the need to switch between lenses
- Very easy evaluation of measurements on layers due to automatic fit function and range selection for measurement data analysis
- ZwickRoell has implemented the radial displacement correction according to ISO 14577: 2015 in InspectorX in conformity with the standard
- Rigid frame construction with the indenter axis exactly in the axis of motion (no tilting moment)
- High positioning accuracy between optics and indenter less than 1 µm

